Categories
HowTo Guides Windows Server

Small Business Server 2008 port forwarding

The following ports that are used by SBS�2008 standard services :

SMTP 25 – Simple Mail Transfer Protocol
HTTP 80 –
Home Page Web
SSL 443
– Home Page Web Secured HTTPS (RWW, OWA, remote desktop�or Terminal Server sessions)
HTTP2�987
– Second SSL Secured on alternate port for SharePoint (optional)
PPTP 1723
– VPN Connections

Note: With SBS 2003, RWW used port 4125.� Terminal Services Gateway has replaced this method which now uses port 443 over HTTPS.� The new method works a lot better when in remote locations which use proxy servers or only allow certain types of traffic (such as WiFi Hotspots) – as port 443 is a standard SSL port.

As with Port forwarding for Small Business Server 2003 – the above ports cover all the standard services, but should your users still be on a 1st generation iPhone or need POP email, the following ports will need forwarding also :

POP3 110 – If using POP3 mail connections
IMAP 143 – iPhone 1st Generation
IMAP SSL 993 – Even better for iPhone 1st Generation

Categories
HowTo Guides Windows Server

Which ports need opening for SBS 2003

When using the full functionality of Microsoft Small Business Server 2003 – it is necessary to open or forward ports within your router config. Port forwarding is needed to allow your SBS server to be ‘visible’ from the internet, and to allow incoming connections such as email, or remote web workplace. The following ports are required :

SMTP 25 – Simple Mail Transfer Protocol
HTTP 80 – Home Page Web
SSL 443 – Home Page Web Secured
HTTP2 444 – Second SSL Secured on alternate port for SharePoint
PPTP 1723 – VPN Connections
RDP 3389 – Remote Desktop Protocol (only needed for direct access, if using RWW website, only 4125 is needed)
RWW 4125 – Remote Web Workplace

If using Outlook over HTTP (also called Outlook Anywhere) the above ports are all that are required, however – if you have any users who still use the ‘original’ iPhone or users who require POP email – the following port forward are needed:

POP3 110 – If using POP3 mail connections
IMAP 143 – iPhone 1st Generation
IMAP SSL 993 – Even better for iPhone 1st Generation

Categories
CentOS HowTo Guides Linux

Setup simple CentOS Linux webserver

We recently needed a quick and easy web server for internal development and testing. I decided to use CentOS as we have a few root servers with 1&1 which run the same Linux version, CentOS also comes pre-installed with Yum which is a feature that allows you to download and install software easily from the command line.

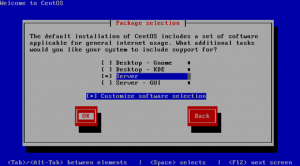
Installing CentOS was simple, and after choosing the command line server version, deselecting all additional packages – the install only took a few minutes… Infact, it took longer to download the ISO’s than it did to install the OS!

After the CentOS 5.5 Install :

— Update all the OS bits using yum (read more on yum)

yum update

— Install the Web server bits

yum install php php-mysql mysql-server php-gd postgres ImageMagick ImageMagick-devel

— Now add a test file to the root of HTML files we will us “http://www.basicconfig.com/linux/vi” (read more on vi)

vi /var/www/html/index.php

Press “i” to start inserting test into your new file, type “<? phpinfo(); ?>” to allow us to check that PHP is up and running. Finish your file by returning to vi command by pressing “esc” then write and quit by typing “:wq

— To find the IP of your server (if provided by DHCP) to allow us to browse from our network

ifconfig | grep "inet addr"

— In your browser window, visit your web servers internal IP – you should see a PHP Info readout

eg : http://192.168.99.10/index.php

— Now start the MySQL service

service mysqld start

— The service should start and display “OK” when it has, set a root password

/usr/bin/mysqladmin -u root password 'mynewpassword'

And that’s pretty much it. If you want to access the server without being on the server itself, you can access with SSH / SFTP / etc – and of course if you want to expose your server to the outside world, you can forward web traffic to the static IP of your web server.

Categories
HowTo Guides Windows

Converting Outlook 2003/2007 nk2 file to Outlook 2010

Today I had an old Windows 2000 client PC  with Outlook 2003, which was being replaced by Windows 7 and Outlook 2010. Out of courtesy (and for an easy life!) I try to make the migration as seamless as possible, which includes taking along recently typed email addresses within Outlook.

Normally this is simply a case of copying the Outlook.nk2 file which is stored within C:\Documents and Settings\Username\Application Data\Microsoft\Outlook\ accross to the new PC – however, this doesn’t work with Outlook 2010. The Outlook 2010 NK2 file is actually a DAT file and is located, on the above operating systems, at C:\Users\{username}\AppData\Local\Microsoft\Outlook\RoamCache\Stream_Autocomplete_y_xxxxxxxxxxxxxxxxxxxxxxxxxxxxxxxx.dat (y = file index, x = random 16-byte key in hex form).

I found the following article cleared this up, and provide a simply “FixItForMe” tool, which providing that you put the old NK2 file in the normal location C:\Users\Username\AppData\Roaming\Microsoft\Outlook – the tool will take care of the conversion for you! Easy…

http://support.microsoft.com/kb/980542

Direct Link to FitIt tool : http://go.microsoft.com/?linkid=9758283